Pages

Wednesday, 19 September 2012

Canon Pixma E500 CISS installation - Youtube

,
 

Canon Pixma E500 CISS installation- Youtube


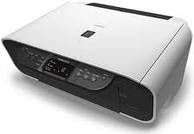
The PIXMA Ink Efficient E500 is built to give you an affordable printing experience. Besides print, copy and scan functionalities, the PIXMA E500 also offers innovative Full HD Movie Print and Fun Filter Effect to dramatize your photos.


Maximum Printing Resolution
4800 (horizontal)*1 x 1200 (vertical)dpi

Print Head / Ink    
Type:     FINE ™ Cartridge
Total Number of Nozzles: 1792
Ink Droplet Size (min.): 2pl
Ink Tank: PG-88, CL-98
Print Speed Based on ISO / IEC 24734.
Click here for summary report
Click here for Document Print and Copy Speed Measurement Conditions    
Color : Approx. 5.0ipm
Black :Approx. 8.6ipm

Printable Width Up to 203.2mm (8-inches)
Borderless: Up to 216mm (8.5-inches)

Ink End Sensor Dot count
Print Head Alignment Manual
Scanner Type Flatbed
Scanning Method CIS (Contact Image Sensor)
Optical Resolution*4 1200 x 2400dpi
Selectable Resolution 25 - 19200dpi


More info Here  
Download Driver and Software Here 
Read more

Tuesday, 17 July 2012

Web for Download CISS Installation Manuals

,


GREAT WEB FOR DOWNLOAD INSTALLATION MANUALS

Great site to learn CISS installation

Continuous Ink Supply Systems (CISS)

Here you can find Installation manuals for the majority of Continuous Ink Supply Systems for printers, all-in-ones, and plotters from Epson, Canon, Hp, Brother, and Roland from INKSYSTEM company. Lot of  quality of Installation Manuals and Videos here.

Usage of CISS
How does Continious Ink System works: watch video
Comparison of printing quality: CISS and original cartridges watch video

Refilling of CISS
How to refill INKSYSTEM CISS: watch video

Reset chip
How to reset chip on NKSYSTEM CISS: watch video
How to install Continuous Ink Supply Systems (CISS)

More info get it HERE


Source from http://www.inksystem.org/instrukcii.htm

7CJDA5CHSMK7
Read more

Tuesday, 19 June 2012

Locate and Repair Common Printer Problems Using HP Diagnostic Tools

,
Can Download Here

HP Print and Scan Doctor was designed by HP to provide users with the troubleshooting and problem solving features needed to resolve many common problems experienced when connected to Windows-based computers. 

Simply run the tool and follow the on-screen instructions

System requirements:       
Windows XP(32bit only) with Service Pack2 and above
Windows Vista (32 and 64 bit)
Windows 7 (32 and 64 bit)
You must have administrative privileges for your PC
Read more

Epson LQ-580 Driver for Windows XP

,

Epson LQ-580 Driver for Windows XP Can Download Here  
Version: 1.1c
Operating system(s):     Windows 95, Windows 98, Windows XP 32-bit, Windows 2000, Windows ME, Windows NT 4.0, Windows NT 3.51, Windows 3.X
Language(s): English, Nederlands
Product(s): Epson LQ-580
Release date: 01 January 2004
File format: EXE
File size:  5.67 MBs


Read more

Tuesday, 12 June 2012

How to fix error B200 on Canon Printers

,


1. Try to Replace Print head and logic board (Replace them at the same time.)
2. Try to Replace Power supply unit Check and Clean Head contact pin condition of the carriage unit
3. Try Check Cable connection especially the carriage FFC

* It maybe the contacts on the print head are damaged and you have to replace the print head to resolve the issue, but before that you can follow the steps above to remove the print head and then cleaning the copper contacts on them with a cotton swab dampened in distilled water until they are clean, after drying them reseat the print head and check the issue.

hope it help you


Read more

Thursday, 7 June 2012

Canon Pixma printer error - Carriage error or Error Code 5100

,
Canon Pixma printer error - Carriage error or Error Code 5100

Problems and Solutions:
Smearing or scratches on the carriage slit filmclean the timing slit film.Foreign material or paper debris that obstructs the carriage movement;
remove foreign material.Ink tank conditions;
Re-seat the ink tanks.
Read more

Brother MFC Printer display "unable to clean" or Error 46

,

First turn of the printer
Switch on the machine while holding down the “menu” button until all the leds are flashing on/off. Now you are in “maintenance” mode.
Press 80
Press the “mono start” button several times until you see “purge: xxxx”
Press “2783” in order to reset the purge counter. You will see: “purge:0000”
Press the "stop" button.
Press “99” to exit the maintenance mode.
Read more

Wednesday, 16 May 2012

How To Service My Printer - MISS / CISS single printer installation guides

,
 
Step by step instructions
  1. Open the front cover
  2. open the ink cartridge locking cover, put the cartridge, close the cartridge locking cover
  3. Stick the tube using double side tape, use cable tie to tie up the tube, and cut the extra cable tie
  4. Stick the tube on the printer
  5. Do cleaning process to make sure perfect print
How To Service My Printer - MISS / CISS single printer installation guides

Read more

How To Service My Printer - MISS / CISS Ink for Multifunction Printers installation guides

,

How To Service My Printer - MISS / CISS Ink for Multifunction Printers installation guides
  • lift the scanner unit
  • open the ink cartridge locking cover, put in the  cartridge and close back
  • stick the tube support in the middle of printer
  • move the cartridge left and right to test smoothness of the tube movement
  • stick the clincher A and B to the tube
  • do cleaning process to make sure prerfect print


Read more

How To Service My Printer - Maxprint Printer Guide for Multifunction Printers

,
 

How To Service My Printer - Maxprint Printer Guide for Multifunction Printers

MISS Guides
  • Place the printer appropiate place
  • open the ink cover and close it back please refer picture above
  • dont raise up the ink system
  • always turn on your printer 
  • please see picture above for error code display at your printer
  • tqvm

Read more

Tuesday, 8 May 2012

Printer says E3 and Printer Status there is a Paper Jam :(

,
In my case “E3” (paper jam error) was caused by a hidden tack pin that had fallen into the printer where the paper is loaded. The pin was lodged between the grey paper pickup roller and a tiny black plastic sensor in the back of the printer. The sensor’s function is to detect paper under it. One can turn the printer upside down and genitally giving the printer a little shake to try and dislodge any obstructing objects. Be careful not to let scanner bed flop open or you might damage the printer
I have found dead moths, lady bugs, cedar bugs, staples, paper clips, food, and tack pins in various printers which I have serviced. 


Read more

How To Service My Printer - Error Code for Canon PIXMA MP287

,


P02 – Carriage Error, there is something wrong with your printer ink cartridge, it could be in wrong position, something blocked the chip (see at the back of cartridge), also P02 error code show sign that your print head is broken or faulty, try to take out both of the cartridge and then put it back.

P07 – Ink Absorber Is Full or Almost Full, you need to reset your printer, here is an article how to
reset your canon mp287 printer. Follow the step, you can reset only if your absorber is almost full. You can’t reset if your ink absorber is full, to fix the absorber is full, you need to disassemble your printer and then replace the ink absorber (it’s just a pieces of sponge located in the printer), last time I just deep the sponge into water until the sponge is clean. I found a video but for MP258, the sponge located at the same position.
Read more

Wednesday, 11 April 2012

Reset Canon Pixma IP2770 | Absorber Full | Error Code 5B00

,
Reset Canon Pixma IP2770 | Absorber Full | Error Code 5B00
 
 
STEP 1:  Entering Service Mode
You have to enter in service mode in order to used the resetter. To do that follow this procedure,

1. Turn off the printer without pulling the power cords.
2. Hold down Resume button and press Power button.
3. Keep holding down Power button and let Resume button go.
4. Then Press Resume button 5 times then let BOTH buttons go.
5. You will notice that the Alternate Blinking error is gone, this means that the printer is in Service Mode state.

STEPS 2: Using the Resetter

1. After you download the resetter, extract it and double click "servicetool.exe"
2. Press the "Main" Button, Then press "EEPROM Clear" button if a pop-up appear just click OK
5. Then power off the printer(sometimes you have to press twice the power button to turn off) and turn on again. and its done!
 
Read more

Tuesday, 27 March 2012

Resetter for canon MP198, MP258, MP276, MP496, MP558, MP568, and MP648.

,
latest resetter for canon MP198, MP258, MP276, MP496, MP558, MP568, and MP648.

The following are the steps that must be done:

  1. Turn on the printer to service mode. how to enter service mode is :
  • While the printer is OFF, press and hold the Start/Stop button (Resume/Cancel in some other models).
  • While holding the Start/Stop button, press and hold the POWER button.
  • When the POWER LED (green light) lit, release the Start/Stop button (still holding the POWER button).
  • Press the Start/Stop button TWICE (still holding the POWER button)
  • Release the POWER button.
  • Wait for the LCD to display 0 (zero).
  1. After the display is 0, attach the printer usb cable to pc, then there will be detected new device (it's normal)
  2. Run service_tool 1050.exe
  3. Confirm detected usb-port numbers on usb port column.
  4. Click the MAIN ink counter reset button, make sure there is paper in the paper feed, because the printer will print after the process is complete.
  5. Click platern ink counter reset button, the printer will print again.
  6. Turn off the printer.
  7. Your printer is ready for use again.
HERE IS THE DOWNLOAD

Read more

canon mx338 error 5b00

,
The waste ink absorber is full and is triggering error 5B00

How to Reset Canon MX338 with Resetter:
Entering Service mode Canon MX338:
1. Turn off the printer without pulling the power cords.
2. Hold down STOP/RESET button and press Power button.
3. Keep holding down Power button and let STOP/RESET button go.
4. Then Press STOP/RESET button twice then let BOTH buttons go.
5. You will notice that the Alternate Blinking error is gone, this means that the printer is in Service Mode state.

Permanent Reset Canon MX338:
1. After you download the resetter, extract it and double click “MX338.exe”
2. Click Reload Button and you will get a new USB port.
3. Load some papers in your printer and press the “Main” Button once, wait until the printing is done.
4. Then press “EEPROM Clear” button to clear EEPROM.
5. Then press EEPROM button and the printer will print some text.
5. Then power off the printer(sometimes you have to press twice the power button to turn off) and turn on again.


Read more

Tuesday, 13 March 2012

print app for ipad that will work with kodak esp 5250 printer

,


Wireless access to your pictures is now at your fingertips with Pic Flick!
Relive and share your favorite iPhone and iPod Touch pictures on a Kodak EasyShare wireless digital frame and Kodak ESP 5200,7200,9200,C300 Series and ESP Office 6100 and 2100 Series All-in-One printers. With a few simple touches you can send pictures to your digital frame or printer.
Kodak EasyShare W820 and W1020 wireless digital frames are like windows to the world. Featuring built-in WiFi, these frames give you seamless access to your memories – whether they are stored on your home computer or online, and now, your iPhone and iPod Touch.
Also with built-in WiFi, the Kodak All-in-One printer makes it easy and affordable to wirelessly print your photos from your iPhone or iPod. So go ahead shoot, print and share; it’s that easy.
Kodak is making it even easier to connect with your friends and family through pictures.
Supporting languages: English, Dutch, French, German, Italian, Spanish, Portuguese, Danish, Norwegian, Swedish, Finnish

Read more

How to Reset Error Code E08 in Canon MP287 - Absorber Full

,


When the MP287 is turned on, it will immediately appear on the LCD panel error E08 MP287. And when we do print command, then the monitor screen will show “The Ink Absorber is Almost Full”. Caption MP287 E08 error on the screen as follows:

  1. Turn on the Canon MP287, MP287 LCD then the panel will pop up error E08, and there is a description of “The Ink Absorber is Almost Full” on the screen of your monitor.
  2. Download Resetter MP287 at this link http://www.mediafire.com/?esuhhe214i1dd6t
  3. Canon MP287 printer must be in a state of SERVICE MODE. Do I read the next step.
  4. Canon MP287 Turn off the E08 error by pressing the power. Do not unplug the power cord.
  5. Press and Hold the button STOP / RESET followed by pressing the POWER button. So both buttons depressed position.
  6. Release the button STOP / RESET but do not release the button POWER.
  7. In these circumstances the POWER button is still depressed, press the STOP / RESET 6 times.
  8. Then release both buttons simultaneously. Then the Canon MP287 will be in Service Mode condition.
  9. LCD Panel MP287 will blank / dark and in your computer will detect new hardware. Ignore it.
  10. The next step Exctract and Run Service Tool for MP287 MP287 E08 error you downloaded earlier.
  11. Click the “PLAY”, then the printer will proceed, then MP258 will print one page with the words “D = 000.0″
  12. Click “Clear EEPROM”.
  13. Then click “EEPROM”, and the printer will print the results MP258 Resetter. Writing one line as follows: “TPage (COPY TTL = 00 000 = 00 000)”.
  14. Canon MP287 Turn off by pressing the power.
  15. Canon MP287 printer that error E08 will be normal again.
Read more

How to Reset Waste Ink Counter Canon Pixma iX5000 and iX4000 - Absorber Full

,


To reset Absorber Full for Canon PIXMA iX4000 or iX5000 you have to enter to service mode. Follow the step to enter to service mode on Canon PIXMA iX4000 or iX5000 :
  1. Connect the Canon PIXMA iX5000 or iX4000 printer to the power cord. ( note : If the automatic power-on function is enabled in the printer, the printer enters the service mode for the first time, but it will never enter the service mode if the printer is turned off by the Power button. This is because the printer remains to be turned on internally if the power is turned off by the Power button. To prevent this, disconnection of the power cord is required before starting the printer in the service mode ) .
  2. With the Canon PIXMA iX5000 or iX4000 printer powered off, while pressing the Resume/Cancel button, press and hold the Power button. (note : Don’t release the buttons. The Power LED lights in green to indicate that a function is selectable.)
  3. While holding the Power button, release Resume/Cancel button. (Don’t release the Power button.)
  4. While holding the Power button, press Resume/Cancel button 2 times, and then release both the Power and Resume/Cancel buttons.
  5. When the Power LED lights in green, press the Resume/Cancel button 4 times to reset waste ink counter in the Canon Pixma iX5000 / iX4000. (note : If the Power LED does not light in green the printer does not enter the service mode, disconnect the power cord and plug it again. Then start from step 1 to start the printer in the service mode again).
  6. At the end of the service mode, press the Power button. The paper lifting plate of the sheet feed unit will be raised.
Note :
  • Each time the Resume/Cancel button is pressed, the Alarm and Power LEDs light alternately, Alarm in orange and Power in green, starting with Alarm LED.
Read more

How to reset waste ink Canon Pixma MP145 - Absorber Full

,

Solution:

  • Connect the printer to a Power source.
  • Turn off the printe.
  • With the Printer power off, press the "Power" button while press and hold Stop/Reset button.
  • When the Power led is light, press "Stop/Reset" button two times while pressing and holding the "Power" button.
  • When releasing the "Power" button and the "Stop/Reset" button, the printer will move into a service mode
  • When the on/off lights in green, press the "Stop/Reset" button four times to reset wase ink counter.
  • Unplug cable power from a power source.
Read more

Service Printer Canon i90 - Waste Ink Tank Full

,

1) Close the print head cover, and turn off the printer. While pressing the Resume/Cancel button, press the Power button. (Do not release the buttons. The LED lights in green to indicate that a function is selectable.)

2) While holding the Power button, release the Resume/Cancel button. (Do not release the Power button.)

3) While holding the Power button, press the Resume/Cancel button three times, and then release the Power and Resume/Cancel buttons. (Each time the Resume/Cancel button is pressed, the LED lights alternately in either orange or green, starting with orange.) During initialization, the LED blinks in green.

4) When the LED stops blinking and lights in green, press the Resume/Cancel button the 4 times. (Each time the Resume/Cancel button is pressed, the LED lights alternately in either orange or green, starting with orange.)

5) Press the Power button. The LED lights in green, and the
selected function is performed. (When the operation completes, the printer returns to the menu selection mode automatically.)

6) Power off then back on and test.
Read more

Monday, 27 February 2012

Printer Canon Pixma MP258 – Absorber Full

,
Printer Canon Pixma MP258 – Absorber Full
If your printer show P07 error it means that your ink absorber inside the printer is almost full. In order to solve this you need to clear or reset the counter protection of your printer. To do this, follow this steps.

First make sure that the power cable and usb cable are connected, before you perform the reset procedure. And download the resetter at the bottom of this post.

FIRST STEPS:  Entering Service Mode
You have to enter in service mode in order to used the resetter. To do that follow this procedure,

1. Turn off the printer without pulling the power cords.
2. Hold down STOP/RESET button and press Power button.
3. Keep holding down Power button and let STOP/RESET button go.
4. Then Press STOP/RESET button twice then let BOTH buttons go.
5. You will notice that the Alternate Blinking error is gone, this means that the printer is in Service Mode state.

SECOND STEPS: Using the Resetter

1. After you download the resetter, extract it and double click "servicetool.exe"
2. Load some papers in your printer and press the "Main" Button once, wait until the printing is done.
3. Then press "EEPROM Clear" button to clear EEPROM.
4. Then press EEPROM button and the printer will print some text.
5. Then power off the printer(sometimes you have to press twice the power button to turn off) and turn on again. and its done!

GFCH5V82RBB9 
Read more

Sunday, 26 February 2012

Printer Canon Pixma MP258 – Error P08

,

First time, I found the problem Canon Pixma MP258 printer will not print from the cpu or the Copy Scan and P08 are the error messages on the printer panel. I could maybe try to reset, e turned out to be, then I created to copy directly, it was also error.
I've lost both cartridges, the ink was discharged, directly, I refill the black  and a color cartridge. Then I do a test print and the result is smooth and good wow.

If this error P08 does not clear, please 
Follow the instructions step by step

1. Turn off printer, cable power still plug in,
2. Press Stop/Reset button  don't release
3. Press Power Button don't release and than release Stop/Reset button
4. Press Stop/Reset button 2X and than release Power Button, wait until service mode to " 0 "
5. Turn off printer, cable power still plug in
6. Press Stop/Reset button  don't release
7. Press Power Button don't release and than release Stop/Reset button
8. Press Stop/Reset button 4X and than release Power Button, wait until service mode to " 1 "
9. Turn off printer, and loose cable power, wait one minute.
10. Connect cable power, turn on printer again, now this printer ready to use.
Read more
 

How to Service my Printer Copyright © 2011 -- Template created by O Pregador -- Powered by Blogger